1. 开发应用
(1)appA
这是appA的web.xml文件内容:
<?xml version="1.0" encoding="UTF-8"?>
<web-app id="WebApp_ID" version="2.4" xmlns="http://java.sun.com/xml/ns/j2ee" xmlns:xsi="http://www.w3.org/2001/XMLSchema-instance" xsi:schemaLocation="http://java.sun.com/xml/ns/j2ee/web-app_2_4.xsd">
<display-name>Saml Source Site Application</display-name>
<welcome-file-list>
<welcome-file>index.jsp</welcome-file>
</welcome-file-list>
<security-constraint>
<web-resource-collection>
<web-resource-name>SecurePages</web-resource-name>
<description>These pages are only accessible by authorized users.</description>
<url-pattern>/admin/*</url-pattern>
<http-method>GET</http-method>
</web-resource-collection>
<auth-constraint>
<description>These are the roles who have access.</description>
<role-name>admin</role-name>
</auth-constraint>
<user-data-constraint>
<description>This is how the user data must be transmitted.</description>
<transport-guarantee>NONE</transport-guarantee>
</user-data-constraint>
</security-constraint>
<login-config>
<auth-method>FORM</auth-method>
<realm-name>myrealm</realm-name>
<form-login-config>
<form-login-page>/login.jsp</form-login-page>
<form-error-page>/fail_login.htm</form-error-page>
</form-login-config>
</login-config>
<security-role>
<description>These are the roles who have access</description>
<role-name>admin</role-name>
</security-role>
</web-app>
这是appA的weblogic.xml文件内容:
<?xml version='1.0' encoding='UTF-8'?>
<weblogic-web-app xmlns="http://www.bea.com/ns/weblogic/90"
xmlns:xsi="http://www.w3.org/2001/XMLSchema-instance">
<security-role-assignment>
<role-name>admin</role-name>
<principal-name>ssouser</principal-name>
</security-role-assignment>
<context-root>/appA</context-root>
</weblogic-web-app>
(2)appB
这是appB的web.xml文件内容:
<?xml version="1.0" encoding="UTF-8"?>
<web-app id="WebApp_ID" version="2.4" xmlns="http://java.sun.com/xml/ns/j2ee" xmlns:xsi="http://www.w3.org/2001/XMLSchema-instance" xsi:schemaLocation="http://java.sun.com/xml/ns/j2ee http://java.sun.com/xml/ns/j2ee/web-app_2_4.xsd">
<display-name>SAML Destination Site Application</display-name>
<welcome-file-list>
<welcome-file>index.jsp</welcome-file>
</welcome-file-list>
<security-constraint>
<web-resource-collection>
<web-resource-name>SecurePages</web-resource-name>
<description>These pages are only accessible by authorized users.</description>
<url-pattern>/admin/*</url-pattern>
<http-method>GET</http-method>
</web-resource-collection>
<auth-constraint>
<description>These are the roles who have access.</description>
<role-name>admin</role-name>
</auth-constraint>
<user-data-constraint>
<description>This is how the user data must be transmitted.</description>
<transport-guarantee>NONE</transport-guarantee>
</user-data-constraint>
</security-constraint>
<login-config>
<auth-method>CLIENT-CERT</auth-method>
<realm-name>myrealm</realm-name>
</login-config>
<security-role>
<description>These are the roles who have access.</description>
<role-name>admin</role-name>
</security-role>
</web-app>
这是appB的weblogic.xml文件内容:
<?xml version='1.0' encoding='UTF-8'?>
<weblogic-web-app xmlns="http://www.bea.com/ns/weblogic/90"
xmlns:xsi="http://www.w3.org/2001/XMLSchema-instance">
<security-role-assignment>
<role-name>admin</role-name>
<principal-name>ssouser</principal-name>
</security-role-assignment>
<context-root>/appB</context-root>
</weblogic-web-app>
2. 创建Domain
(1)创建dev_domain,作为SAML的source一方。
(2)创建dev2_domain,作为SAML的target一方。
3. 创建用户
(1)在dev_domain中Security Realms的myRealm创建用户ssouser/welcome1。
(2)在dev2_domain中Security Realms的myRealm创建用户ssouser/welcome1。
说明:这里只是出于测试的目的,分别在dev_domain和dev2_domain中创建了相同的用户。
实际使用时,一般两个Domain会使用同一个身份认证提供者,比如LDAP或数据库。
3. 部署应用
(1)部署appA 到dev_domain的Admin Server上 。
(2)部署appB 到dev2_domain的Admin Server上 。
4. 测试应用
访问http://localhost:7001/appA,会出现欢迎页面,输入ssouser/welcome1,成功登陆后
点击链接:Application - appB on domainB,会报错,这是因为appB需要通过数字证书认证,因为没有得到相关信息所以报错。
当配置好SSO后,点击该链接应该可以进入appB中的受保护页面。
5. 配置SSL
(1) 在dev_domain中,为Admin Server 配置SSL。
(2) 在dev2_domain中,为Admin Server 配置SSL。
具体步骤请参考《配置双向SSL认证》,这里我配置的是单向SSL认证:Two Way Client Cert Behavior:Client Certs Not Required。
6. 在dev_domain中配置SAMLCredentialMapper
SAMLCredentialMapper的角色是SAML security assertions的Provider,即作为断言的提供方。
 (1)创建SAMLCredentialMapper
选择myrealm,Providers,CredentialMapping,点击New,Type选择SAMLCredntialMapperV2

Name Qualifier:bea.com
Default Time To Live:120
Default Time To Live Offset:0
Signing Key Alias:server
Signing Key Pass Phrase:123456
Confirm Signing Key Pass Phrase:123456
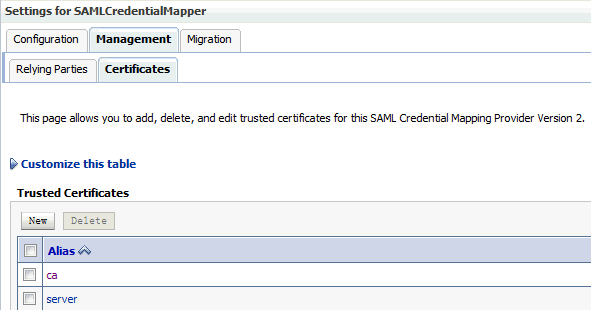
 (3)配置Management->Certificates
这里我导入了两个数字证书:ca.der和server.der。
 生成ca.der
keytool -keystore truststore.jks -keypass 123456 -storepass 123456 -alias ca-import -trustcacerts -file certs/ca.cer
keytool -export -keystore truststore.jks -storepass 123456 -alias ca -file ca.der

生成server.der
keytool -keystore truststore.jks -keypass 123456 -storepass 123456 -alias server -import -trustcacerts -file certs/server.cer
keytool -export -keystore truststore.jks -storepass 123456 -alias server -file server.der
(4)配置Management->Relying Parties
 Enabled:勾上
Description:demoSAML
Target URL:http://localhost:8001/appB/admin/services.jsp
Assertion Consumer URL:https://localhost:8002/samlacs/acs
Assertion Consumer Parameters:APID=ap_00001
Signature Required:勾上
Include Keyinfo:勾上


7. 在dev_domain中,为Admin Server配置SAML 1.1 Source Site
选择Federation Services,SAML 1.1 Source Site
Source Site Enabled:勾上
Source Site URL:http://localhost:7001/appA
Signing Key Alias:server
Signing Key Passphrase:123456
Intersite Transfer URIS:/samlits_ba/its
/samlits_ba/its/post
/samlits_ba/its/artifact
/samlits_cc/its
/samlits_cc/its/post
/samlits_cc/its/artifact
ITS Requires SSL:勾上
Assertion Retrieval URIs:/samlars/ars
ARS Requires SSL:勾上


 (2)配置Management->Certificates
这里我导入了两个数字证书:ca.der和server.der,步骤同6(3)。


2. http://biemond.blogspot.jp/2009/05/sso-with-weblogic-103-and-saml.html
5. 配置SSL
(1) 在dev_domain中,为Admin Server 配置SSL。
(2) 在dev2_domain中,为Admin Server 配置SSL。
具体步骤请参考《配置双向SSL认证》,这里我配置的是单向SSL认证:Two Way Client Cert Behavior:Client Certs Not Required。
6. 在dev_domain中配置SAMLCredentialMapper
SAMLCredentialMapper的角色是SAML security assertions的Provider,即作为断言的提供方。
选择myrealm,Providers,CredentialMapping,点击New,Type选择SAMLCredntialMapperV2
(2)配置Provider Specific
Issuer URI:http://www.bea.com/demoSAMLName Qualifier:bea.com
Default Time To Live:120
Default Time To Live Offset:0
Signing Key Alias:server
Signing Key Pass Phrase:123456
Confirm Signing Key Pass Phrase:123456
这里我导入了两个数字证书:ca.der和server.der。
keytool -keystore truststore.jks -keypass 123456 -storepass 123456 -alias ca-import -trustcacerts -file certs/ca.cer
keytool -export -keystore truststore.jks -storepass 123456 -alias ca -file ca.der
生成server.der
keytool -keystore truststore.jks -keypass 123456 -storepass 123456 -alias server -import -trustcacerts -file certs/server.cer
keytool -export -keystore truststore.jks -storepass 123456 -alias server -file server.der
(4)配置Management->Relying Parties
Description:demoSAML
Target URL:http://localhost:8001/appB/admin/services.jsp
Assertion Consumer URL:https://localhost:8002/samlacs/acs
Assertion Consumer Parameters:APID=ap_00001
Signature Required:勾上
Include Keyinfo:勾上
7. 在dev_domain中,为Admin Server配置SAML 1.1 Source Site
选择Federation Services,SAML 1.1 Source Site
Source Site Enabled:勾上
Source Site URL:http://localhost:7001/appA
Signing Key Alias:server
Signing Key Passphrase:123456
Intersite Transfer URIS:/samlits_ba/its
/samlits_ba/its/post
/samlits_ba/its/artifact
/samlits_cc/its
/samlits_cc/its/post
/samlits_cc/its/artifact
ITS Requires SSL:勾上
Assertion Retrieval URIs:/samlars/ars
ARS Requires SSL:勾上
8. 在dev2_domain中配置SAMLIdentityAsserter
SAMLIdentityAsserter的角色是SAML security assertions的Consumer,即作为断言的消费方。
它负责验证断言是否正确有效。
(1)创建SAMLIdentityAsserter
选择myrealm,Providers,Authentication,点击New,Type选择SAMLIdentityAsserterV2
这里我导入了两个数字证书:ca.der和server.der,步骤同6(3)。
(3)配置Management->Asserting Parties
Enabled:勾上
Description:demoSAML
Target URL:http://localhost:7001/appA
POST Signing Certificate Alias:server
Source Site Redirect URIs:/appB/admin/services.jsp
Source Site ITS URL:https://localhost:7002/samlits_ba/its
Source Site ITS Parameters:RPID=rp_00001
Issuer URI:http://www.bea.com/demoSAML
Signature Required:勾上
Asserting Signing Certificate Alias:server
9. 在dev2_domain中,为Admin Server配置SAML 1.1 Target Site
选择Federation Services,SAML 1.1 Target Site
Destination Site Enabled:勾上
Assertion Consumer URIs:/samlacs/acs
ACS Requires SSL:勾上
SSL Client Identity Alias:server
SSL Client Identity Pass Phrase:123456
POST Recipient Check Enabled:勾上
POST one Use Check Enabled:勾上
Used Assertion Cache Properties:APID=ap_00001
10. 测试
(1)先访问http://localhost:8001/appB,会提示你将会到localhost:7002去验证用户名和口令:
在浏览器地址栏中,会显示https://localhost:7002/samlits_ba/its?RPID=rp_00001&TARGET=http://localhost:8001/appB/admin/services.jsp,说明验证通过后会导航到services.jsp页面。
输入ssouser/welcome1,显示
http://localhost:8001/appB/admin/services.jsp 。
(2)先访问http://localhost:7001/appA,会出现欢迎页面,输入ssouser/welcome1,成功登陆后
点击链接:Application - appB on domainB,会直接进入http://localhost:8001/appB/admin/services.jsp页面,无需再次提供用户名/口令。
Project 下载:sso-with-saml1.1.7z
参考文献:
1. http://www.oracle.com/technetwork/articles/entarch/sso-with-saml-099684.html2. http://biemond.blogspot.jp/2009/05/sso-with-weblogic-103-and-saml.html


没有评论:
发表评论